

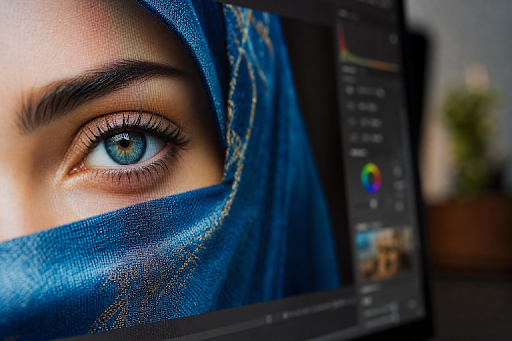
Upscaling enlarges an image by increasing its pixel dimensions, making it more useful for print, larger displays, product listings, presentations, and social posts. A capable image upscaler can produce a cleaner, more detailed result than simple resizing, but the best outcome still depends on the quality of the original file. The goal is not always to make an image as large as possible. It is to create a version that looks convincing at its final viewing size. That means starting with a clean source, choosing a sensible enlargement amount, checking important details closely, and exporting a file suited to its intended use.
What Image Upscaling Really Does
Image upscaling creates a larger version of a file by adding pixels between and around the existing ones. Pixel dimensions, such as 1,200 by 800 pixels, determine how much image data exists. Print resolution, usually expressed as PPI or DPI, determines how densely those pixels are placed on paper. Traditional resizing methods estimate new pixels from nearby colors and tones. AI-based approaches can also analyze patterns in hair, fabric, foliage, edges, and texture to produce a more detailed-looking result. This broader area is often described as super-resolution imaging. The keyword is “construct.” The missing detail is estimated rather than perfectly recovered from the original.
Why Upscaling Cannot Fix Every Problem
Even strong upscaling has limits. A photo with slight softness may improve well, while an image with severe motion blur, missed focus, heavy JPEG artifacts, or aggressive noise reduction may not. Enlarging a damaged file can make its flaws more apparent, especially if it has already been downloaded, compressed, and resaved several times. Review tiny text, logos, faces, hands, license plates, and product labels carefully. These details carry meaning, so a result can appear sharp while still being inaccurate. Keep the original file untouched and compare it with the enlarged version before publishing, printing, or using it for documentation.
Start With The Best Source File
The original camera image, design export, or scan is almost always a better starting point than a screenshot or website thumbnail. Find the highest-resolution version available, remove unnecessary borders, and crop with the final placement in mind. A clean crop prevents the upscaler from spending pixels on areas that will be discarded later, corrects obvious exposure problems, dust, scratches, and severe noise before enlargement. Avoid repeatedly saving a working image as a JPEG, as each save can introduce compression artifacts. Store a separate, untouched copy of the original before beginning any edits.
A Step-By-Step Upscaling Workflow
- Define the final use. Decide whether the image is for a poster, ecommerce listing, slide deck, social post, website banner, or print order.
- Check the dimensions. Record the current pixel width and height, then estimate what the final destination needs.
- Inspect the source. Look for blur, noise, color shifts, compression marks, damaged areas, and distracting objects.
- Make basic edits first. Crop, correct exposure, clean defects, and complete compositional changes while the file is still smaller.
- Choose a moderate scale factor. Start with the smallest enlargement that meets the project requirement.
- Upscale once. Repeated enlargements can compound artifacts and unnatural texture.
- Review at 100 percent. Inspect edges, lettering, faces, shadows, and repeating patterns.
- Export for the destination. Create separate versions when the same image is needed for print and online use.
Choosing Between 2×, 4×, And Larger Sizes
A 2× upscale is often enough for modestly small photos, presentations, and web graphics. A 4× enlargement can help a small source support a larger display, a tighter crop, or a moderate print. Going beyond 4× should be reserved for specific needs, because the software must estimate far more missing information. Before processing a large batch, test a close crop containing hair, text, fabric, a product edge, or another high-detail area. This reveals whether the result appears natural without waiting for the full image to finish loading.
Best Settings For Different Image Types
Photographs
Use restrained sharpening and natural texture settings. Portraits deserve close attention to the eyes, teeth, hair, jewelry, and skin. Overprocessing can create plastic-looking faces or overly crisp outlines.
Product Images
Check straight edges, packaging labels, color accuracy, and fine material details. Product text should be verified against the actual package, not trusted solely because it appears readable when enlarged.
Logos, Graphics, And Screenshots
Use PNG or another lossless format when transparency and clean edges matter. For logos and text-heavy graphics, vector artwork is usually preferable because it can scale precisely. Screenshots require extra caution, since reconstructed interface text may look plausible but differ from the original.
Old Scans
Clean dust, fading, scratches, and discoloration before enlarging. Save a restoration master and a separate sharing copy, then compare key facial features and historical details with the scan to avoid introducing false features.
Preparing Images For Print, Web, And Social Media
For Print
Confirm the printer’s requested dimensions, color requirements, and file type. Changing a file from 72 DPI to 300 DPI does not create more pixels. It only changes how existing pixels are interpreted for printing. Request proof when producing posters, signage, or a large print run.
For Websites
Resize each image to its largest expected display area, then compress it carefully to control page weight. Modern sites can use responsive images in HTML, so browsers receive an appropriate file for the visitor’s screen. Use descriptive file names and useful alt text as part of the publishing process.
For Social Media
Export separate square, portrait, and landscape versions rather than relying on automatic cropping. Keep key subjects away from the edges, and inspect the uploaded result because platforms often apply another round of compression.
Common Upscaling Mistakes To Avoid
- Starting with a tiny thumbnail instead of the original file.
- Upscaling before cropping, cleanup, or color correction.
- Choosing the largest available scale with no practical need.
- Applying heavy sharpening that creates halos and harsh edges.
- Trusting reconstructed text, logos, or labels without verification.
- Saving JPEG versions repeatedly during editing.
- Using one oversized export for every website and platform.
- Deleting the original after making the enlarged version.
How To Check The Final Image
- View the file at 100 percent magnification.
- Zoom out to the size most people will actually see.
- Compare it side by side with the original.
- Inspect faces, lettering, borders, shadows, and repeated textures.
- Confirm that the file size and format fit the destination.
- Test it on a phone, desktop display, or printed proof when practical.
Frequently Asked Questions
Can An Image Be Upscaled Without Losing Quality?
A careful workflow can limit visible quality loss and create a much more useful large file. However, no tool can perfectly restore information that was never captured in the source image.
Is AI Upscaling Better Than Traditional Resizing?
Traditional resizing can work well for small adjustments and simple graphics. AI upscaling may produce more convincing detail in photographs, but it requires closer review because generated details can be inaccurate.
Should An Image Be Sharpened Before Or After Upscaling?
Avoid heavy sharpening before enlargement because it can amplify noise and compression artifacts. Test mild corrections before and after upscaling, then keep the version that looks most natural at the final viewing size.
What Is The Best File Format For An Upscaled Image?
JPEG is common for photographs, while PNG is useful for graphics, transparency, and crisp edges. For websites, use an efficient modern format when supported, while keeping a high-quality master file for future edits.
How Large Can An Image Be Upscaled?
The useful limit depends on the source quality, subject matter, viewing distance, and final purpose. In most cases, the smallest enlargement that meets the requirement will look more credible than an extreme upscale.
Conclusion
High-quality image upscaling starts with a clean source, a defined output goal, and realistic expectations about what the original file can support. Before enlarging, correct important issues such as cropping, color, noise, distractions, and minor imperfections so these problems are not unnecessarily amplified. Upscale once based on the final dimensions and intended use, then inspect meaningful details closely, including faces, text, logos, edges, textures, and fine patterns. Avoid repeated resizing and compression, which can gradually reduce image quality and introduce unwanted artifacts. Export separate versions optimized for print, web, social media, and other screens, using appropriate dimensions and file settings for each destination. A moderate, well-reviewed enlargement is usually the most reliable path to a polished final image because it improves usability without creating unrealistic expectations about details that were never present in the original.
