

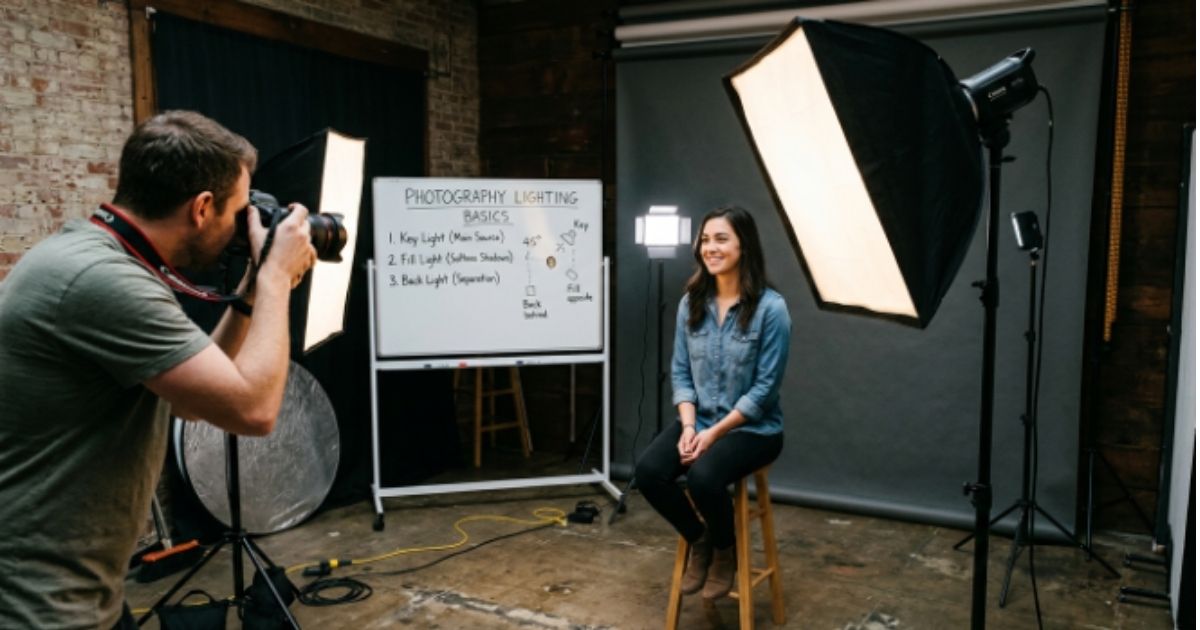
Photography becomes much easier when you understand how light shapes every image. Photography lighting basics help you control brightness, shadows, color, and mood instead of leaving them to chance. Whether you’re taking portraits, landscapes, products, or everyday photos, good lighting can turn an ordinary scene into something memorable. You don’t need expensive gear to get started. Natural light from a window or sunlight can teach you many important lighting techniques.
As you gain confidence, you can explore artificial lighting photography, flash, reflectors, and other tools. Learning light quality and direction also helps you make smarter camera choices. This guide explains the essential concepts in simple terms so beginner photographers can build stronger skills and create better photos.
What Are Photography Lighting Basics?
At its simplest, photography lighting basics means learning how light behaves before and during a photograph. Every image depends on the capture of light. Light travels through the lens and reaches the camera sensor. Your aperture controls how much light enters the camera. Shutter speed controls how long the sensor receives that light. ISO controls how strongly the camera responds to the available light. Together, these controls form the exposure triangle. When you understand this relationship, you can make smarter camera settings instead of guessing. Too much light can cause overexposure. Too little light can create underexposure and unwanted noise.
However, exposure represents only one part of the story. Light also controls shape, mood, color, and detail. A portrait taken beside a large window can have gentle shadows and smooth skin. The same person photographed under a small bare bulb may have hard shadows and stronger facial texture. That’s why photographers study light and shadow together. You need bright areas and dark areas to create contrast, depth, and texture. Good beginner photography lighting isn’t about making every corner bright. It’s about deciding where you want attention to go. Once you can look at a room and identify the direction, quality, and brightness of its light, you already have an important professional skill.
Why Light Matters More Than Expensive Gear
A better camera can’t automatically fix poor lighting. A simple camera with excellent illumination can often create a stronger image than an expensive camera used under uncontrolled light. Consider a portrait beside a bright window. The window acts as a large light source. It can create smooth transitions across the face. Move the subject into direct midday sun and the result changes immediately. The lesson is simple. Lighting control often matters more than equipment cost.
What Are the Different Types of Light in Photography?
Understanding the major types of lighting in photography gives you more creative choices. Natural light photography uses light already present in the environment. Sunlight is the most common example. Window light also works beautifully indoors. Ambient lighting comes from existing sources such as room lights, signs, lamps, and other fixtures. Artificial lighting photography uses added light that you control. This includes flashes, LEDs, strobes, and studio systems. Continuous lighting stays on while you compose the image. Flash systems produce short bursts of illumination. Each option behaves differently, so learning their strengths makes your lighting techniques more effective.
For example, a speedlight, flashgun, or off-camera flash gives you more control than a basic pop-up flash or built-in flash. A studio photographer may use a studio flash or powerful strobe lighting for consistent results. A creator shooting video may prefer continuous light from LED panels because it lets them see the effect before taking the photograph. Existing ambient light can also become part of the composition. A candle creates candlelight with a warm feeling. Household lamps can create interesting indoor scenes. The best photography light sources depend on your subject, location, style, and desired mood.
Natural Light vs. Artificial Light
Natural light photography offers an easy way to learn because you don’t need much equipment. You can move the subject closer to a window or change the shooting time. With artificial light, you gain more control over direction and power. Neither approach is automatically better. A photographer who understands both can adapt quickly to changing conditions.
Understanding Light Quality, Direction, and Intensity
Three qualities shape almost every lighting decision: quality, direction, and intensity. Light quality describes how light moves from bright areas into shadows. Hard light creates strong edges and hard shadows. A cloudless sun or small light source can produce this effect. Soft light creates a longer shadow transition. A cloudy sky, large window, softbox, or large diffuser can create it. Soft light often works well for portraits because it reduces harsh shadows and produces gentle skin tones. Hard light can still be useful. It works beautifully for architecture, dramatic portraits, street scenes, and images that need bold contrast.
Light direction matters just as much. Direct light aimed toward a subject can produce a clear and powerful look. Directional light coming from the side can reveal shape and texture. Reflected light bounces from a wall, floor, or reflector and can soften the result. Light also changes as it moves through space. This behavior is known as light falloff. The inverse square law explains why a light becomes weaker as its distance from the subject increases. In practical terms, moving a light closer can create stronger illumination and faster falloff. Moving it farther away can create more even illumination across the scene. Understanding light intensity, distance, and placement gives you far more control.
Hard Light vs. Soft Light for Different Subjects
Use soft light when you want gentle transitions and flattering soft shadows. It works especially well for portrait photography, indoor portraits, newborn sessions, and many types of product work. Use hard light when you want sharper edges, strong texture, or a dramatic mood. For example, landscape photography often benefits from directional sunlight because it can emphasize mountains, buildings, and natural textures.
What Is Color Temperature in Photography?
Light doesn’t always look white. Some sources appear orange or yellow. Others look blue. Color temperature describes this difference using the Kelvin scale. Lower Kelvin values usually create warmer-looking light. Candlelight sits toward the warm end. Tungsten lighting also produces a warm appearance. Daylight generally sits closer to the middle of the scale. Shade and some fluorescent lighting can appear cooler. Understanding Kelvin helps you predict how different sources will affect your photographs. It also helps you create a consistent visual mood instead of letting unwanted colors appear randomly.
Your camera uses white balance to interpret these differences. Auto white balance works well in many ordinary situations. Yet it can struggle when several sources have different colors. This situation is called mixed lighting. For example, a room may contain warm bulbs while blue daylight enters through a window. The result can produce an unwanted color cast across the image. You can choose a manual white balance setting or adjust the color during editing. RAW photography provides much more flexibility for these adjustments. You can also use intentional warm tones or cool tones to create a specific atmosphere.
How White Balance Affects Your Photos
Correct white balance keeps neutral objects looking neutral. A white shirt should normally look white rather than orange or blue. When the scene contains consistent light, daylight balance or another suitable preset can work well. When conditions become complicated, manual control gives you greater accuracy.
The Basic Photography Lighting Setup
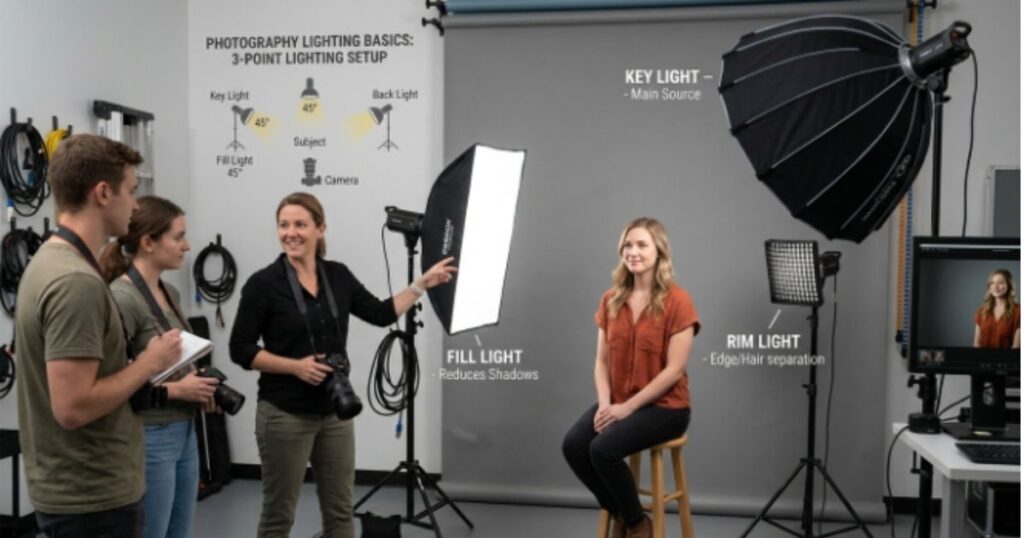
A good lighting setup doesn’t need five or six lights. Start with one. The main light is called the key light. It controls much of the subject’s brightness, shape, and shadow pattern. You can use a window, LED panel, flash, or studio light as your key light. Move it to different angles and watch how the face changes. A key light position near the camera can create even illumination. Move it farther to the side and you create more dimension. The goal is to learn what each change does before adding another light.
Once you understand one light, introduce a fill light. The fill light position usually sits opposite the key light and reduces deep shadows. A white wall or reflector can provide fill without requiring another powered light. Add a back light when you want separation between the subject and background. This setup creates the foundation of three-point lighting. A simpler two-point lighting arrangement uses a key and fill. You can also use a rim light or edge light behind the subject. The most important rule is simple: control each light for a reason. More lights don’t automatically create better photographs.
One-Light Setup vs. Three-Point Lighting
A one-light arrangement is ideal for learning because every change is easy to see. Once you understand how the key light shapes your subject, three-point lighting becomes easier to manage. The key creates the main form. The fill controls shadow strength. The rim or back light separates the subject from the background.
5 Basic Lighting Positions Every Beginner Should Know
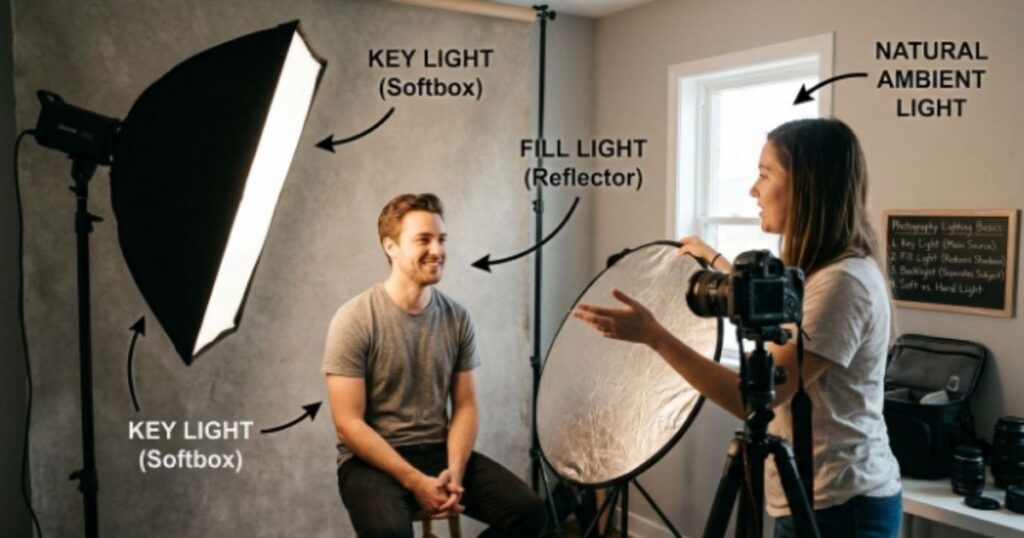
Learning basic lighting positions gives you a practical way to change a photograph without changing the subject. Front lighting places the light near the camera direction. It usually creates even illumination and fewer visible shadows. Side lighting places the source beside the subject. It reveals facial structure and creates stronger contrast. 45-degree lighting sits between front and side lighting. It remains one of the most useful choices for portrait lighting because it can balance shape with flattering illumination. These positions don’t need exact measurements. Small movements can create noticeably different results.
Backlighting places the light behind the subject. It can produce silhouettes or bright outlines around hair and clothing. This effect becomes especially useful for rim lighting and edge lighting. Top lighting comes from above and can work well for certain products or dramatic scenes. Floor lighting points upward and creates an unusual appearance because people naturally expect light to come from above. You can use it for creative portraits or horror-inspired images. The important lesson is that light placement changes how viewers read the subject. Try moving the source instead of changing your entire camera setup.
How Light Position Changes Shadows
Shadows reveal where your light sits. If a shadow falls behind the subject, the source sits somewhere in front. If it stretches toward the camera, the source may sit behind. Watch the shadow before touching your camera settings. It often tells you exactly what needs to change.
How to Use Natural Light for Better Photos
Natural lighting gives beginners an excellent training ground. It costs nothing and changes constantly. Start with window light indoors. Place your subject near the window and turn them slowly. At one angle, the light may illuminate the entire face. At another, it may create beautiful side shadows. Cloudy light offers another useful lesson. Clouds act like a giant natural diffuser and create broad, soft illumination. By contrast, direct sunlight creates stronger highlights and sharper shadows. Instead of fighting these conditions, learn what each one offers.
Outdoor conditions also change throughout the day. Early and late sunlight often creates warmer tones and longer shadows. This is why photographers love golden-hour sessions. Midday sun can look harsh because it sits high above the subject. Open shade can solve that problem by giving you softer illumination. A reflector can return light into dark areas. A diffuser can reduce harsh illumination. A scrim can soften strong sunlight across a subject. A black flag can block unwanted light. These simple tools can transform outdoor photography lighting without requiring a complicated studio.
Best Times of Day for Natural Lighting
Morning light can feel fresh and gentle. Midday light usually creates stronger contrast. Late afternoon can produce warmer illumination. Golden hour offers soft, low-angle sunlight and attractive warm tones. Overcast conditions provide broad, diffused light throughout the day. There isn’t one perfect time for every photograph. The best choice depends on your subject and the mood you want.
Essential Photography Lighting Equipment for Beginners
You don’t need a room full of lighting equipment to start. A basic portable lighting kit can include one light, a stand, and a modifier. A speedlight works well for photographers who want portability. A continuous LED works well when you want to see the effect before shooting. A softbox spreads light across a larger area and creates softer shadows. An umbrella offers another simple way to broaden illumination. A reflector can bounce light back toward your subject. A diffuser can reduce harsh light. These tools form the foundation of many practical lighting systems.
As your skills improve, you can add more specialized gear. A light stand keeps your source stable. A flash trigger lets you fire compatible flashes away from the camera. A modeling light helps you preview the direction of a studio source. A lighting modifier can change the size, spread, softness, or direction of light. Professional photographers may eventually use studio lighting, powerful strobes, grids, flags, and several modifiers. However, buying everything at once can create confusion. Start with one source and learn how it behaves. Your equipment should solve a problem rather than simply fill your camera bag.
Do You Need Expensive Lighting Gear?
No. A bright window can teach you portrait lighting fundamentals. A white wall can act as reflected light. A bedsheet can soften window light when used safely and appropriately. A simple LED panel can introduce controlled artificial light. Skill comes from understanding what the light does. Expensive equipment becomes more valuable after you know what you need it to accomplish.
Practical Photography Lighting Tips for Beginners
The fastest way to improve is to slow down before pressing the shutter. First, look around the scene. Identify every light source. Notice its size and direction. Ask whether the light creates hard shadows or soft shadows. Check whether the scene contains warm and cool sources. Then decide what you want the viewer to notice first. These simple habits turn random shooting into intentional photography. One of the most useful photography lighting tips is to change one variable at a time. Move the subject. Then move the light. Then change the camera position. This approach makes each result easier to understand.
You should also watch the subject-to-light distance. Moving the source closer changes its intensity and falloff. Moving it sideways can add depth. Raising it can create more natural facial shadows. Lowering it can produce a strange or dramatic effect. Try bouncing flash photography from a neutral ceiling or wall when direct flash looks harsh. Use a reflector when the shadow side needs a gentle lift. Keep distracting mixed lighting under control. Most importantly, don’t try to eliminate every shadow. Shadows in photography can add mood, dimension, and visual interest. The strongest lighting techniques usually come from making deliberate choices.
A Simple Lighting Exercise for Beginners
Place one object near a window. Photograph it from the front, side, and back. Then move the object farther from the window. Compare the highlights, dark areas, texture, and shadow shape. Repeat the exercise with a lamp or LED. Within a few sessions, you’ll start recognizing changes in light direction almost instinctively.
Common Photography Lighting Mistakes and How to Avoid Them
Many beginners assume brighter means better. It doesn’t. Excessive brightness can remove texture and cause overexposure in skin, clothing, or reflective objects. Direct on-camera flash can also create flat faces and distracting highlights. Another common mistake involves placing every light close to the camera. That setup often reduces depth because the illumination reaches the subject too evenly. Mixing a warm lamp with cool daylight can create an unwanted color cast. Using hard light on a subject that needs gentle illumination can also produce unflattering harsh shadows.
The solution usually involves a small adjustment rather than expensive gear. Move the source to the side when the image looks flat. Add a reflector when shadows become too deep. Use a softbox or diffuser when the light looks too harsh. Move the subject away from a distracting background when separation is needed. Check your white balance when colors look strange. Watch your histogram when bright areas appear clipped. During low light photography, stabilize the camera and choose an appropriate shutter speed. If you understand the reason behind the problem, fixing it becomes much easier.
Why Your Photos Look Flat or Too Harsh
Flat photographs often come from front lighting with little directional change. Harsh photographs often come from a small source placed close to the subject. Moving the light to one side can create stronger form. Making the source appear larger can create softer transitions. Even a simple change can turn an ordinary frame into a much more dimensional image.
How to Practice Photography Lighting at Home
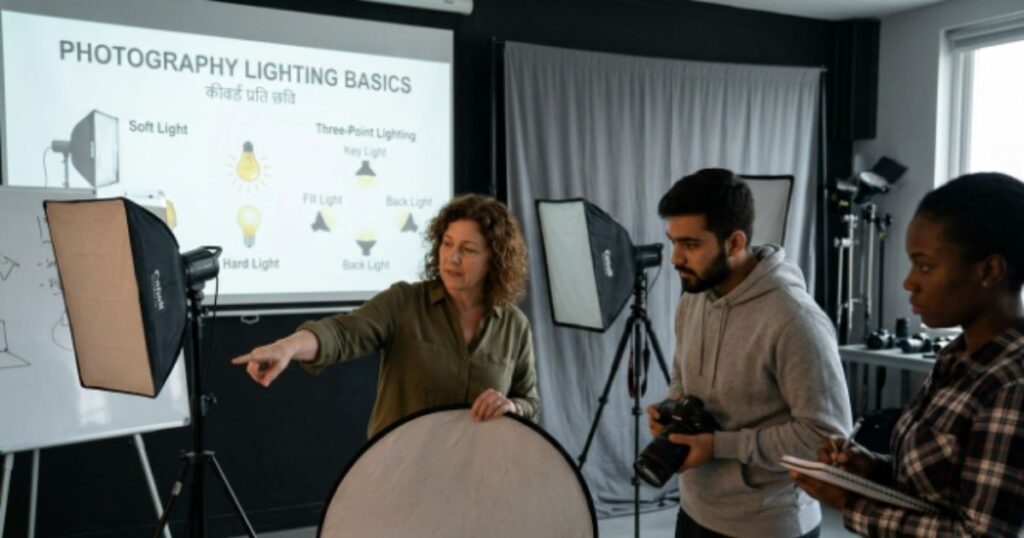
Your home can become a surprisingly useful photography classroom. Start with indoor photography lighting near a large window. Choose one object and photograph it under different conditions. Try morning light. Try afternoon light. Move the subject closer and farther from the window. Then turn the subject toward and away from the source. These simple experiments teach light intensity, direction, falloff, and shadow behavior without requiring expensive equipment. You can practice with fruit, books, glassware, plants, or household objects. Product photography lighting becomes much easier when you learn how reflections and shadows respond to small changes.
After mastering natural light, introduce one artificial source. A desk lamp or LED can teach the same core principles. Experiment with a softbox, umbrella, reflector, or other lighting modifier if available. Try high key lighting by creating a bright scene with gentle shadows. Then try low key lighting by allowing large areas to fall into darkness. Practice portrait photography, still life photography, and product photography with the same light. Keep notes about the source, distance, direction, and camera settings. After several sessions, you’ll notice patterns. That’s when professional photography lighting starts to feel less mysterious and much more predictable.
A 7-Day Photography Lighting Practice Plan
Spend the first day simply observing light around your home. On the second day, compare hard and soft sources. On the third, test the five basic lighting positions. On the fourth, practice window light. On the fifth, create a one-light portrait. On the sixth, experiment with color temperature and white balance. On the seventh, combine the techniques in one finished photograph. Keep the setup simple. The goal is not to create complicated images. The goal is to understand why each image looks the way it does.
Conclusion
Strong photography begins when you learn to see light before you learn to control it. The essential photography lighting basics are easier to understand when you focus on four ideas: quality, direction, intensity, and color. Learn how hard light differs from soft light. Watch how shadows change when you move the source. Understand how color temperature affects the scene. Use white balance to keep colors natural. Then explore key light, fill light, back light, and rim light as your skills develop.
You don’t need a professional studio to become confident with lighting. A window can teach you natural light. A lamp can teach you direction. A reflector can teach you bounce. One affordable flash can introduce you to off-camera flash and controlled artificial lighting photography. The real breakthrough comes through repetition. Observe the light. Change one thing. Take the photo. Study the result. Then try again. With consistent practice, beginner photography lighting becomes a practical skill that can improve portraits, products, landscapes, fashion images, and almost every other type of photograph.
FAQ’S About Photography Lighting Basics
What are the basic rules for lighting in photography?
The basics include controlling light direction, quality, intensity, color temperature, and shadows. Good lighting should complement the subject and create the desired mood.
What is the 20-60-20 rule in photography?
The 20-60-20 rule generally refers to balancing highlights, midtones, and shadows to create a pleasing exposure and visual contrast.
What are the 7 basics of photography?
The seven common basics are light, composition, exposure, aperture, shutter speed, ISO, and focus. Together, they form the foundation of strong photography.
What is the 3 lighting rule?
The three-light rule usually means three-point lighting: a key light, fill light, and back light. This setup creates depth and separates the subject from the background.
What are the four C’s of lighting?
The four C’s are commonly described as color, contrast, consistency, and control. They help photographers create balanced and intentional lighting.
People Read Also: 75 Inch TV Dimensions: Complete Size, Width, Height & Space Guide

My name is M.Adil, I am specialize in creating thoughtful digital content that informs, inspires, and engages readers worldwide. Every piece is written with care and originality.